Homeschool Resources - Keep them ahead of the curve!
Over 2,000 FREE Math Videos (Algebra, Geometry, Trig, Calculus)
Show and Know: Compilation of Videos By Subject
Short Physics Videos
ELEMENTARY/MIDDLE SCHOOL MATH, COMPUTERS AND LIFE SKILLS
HIGH SCHOOL/COLLEGE: MOST SUBJECTS
HIGH SCHOOL: MOST SUBJECTS
HIGH SCHOOL SCIENCES: (Most Science Subjects and Computers)
HOW IT'S MADE VIDEOS
EDUCATIONAL VIDEOS FOR KIDS (ALL SUBJECTS)
ALGEBRA 1 Curriculum and Video Lessons Online
ALGEBRA 2 Curriculum and Video Lessons Online
SCIENCE EXPERIMENT VIDEOS
Watch actual Surgical Procedures being performed live.
COMPREHENSIVE site providing VIDEO LECTURES, LiveOnline TESTS, Audio lectures etc in the fields of Biology, Physics,Chemistry,Mathematics,Computer Science,Engineering,Medicine, Management and Accounting, Dentistry etc FREE to its visitors... This site provides free video and audio lectures of whole courses conducted by faculty from reputed universities around the world. Science Animations provide students with fun and innovative ways of learning. Free live timed online tests with instant feedback and explanations will help you refine your test taking skills.
Academic Earth
Thousands of video lectures from the world's top scholars.www.academicearth.org
Internet Archive
Collection of more than two-hundred thousand free historical videos, many academic.www.archive.orgLearner.org
Professionally developed programming for K-12 classrooms.www.learner.orgMath TV
Professional video lessons in mathematics. Covers basic math through calculus.www.mathtv.comNeoK12
Aggregator of high-quality educational videos from around the Web.www.neok12.com
ResearchChannel
3,500 videos from distinguished researchers and scholars.www.researchchannel.org
PBS
Free videos from your favorite PBS programs, including NOVA and Frontline.www.pbs.org/video
WonderHowTo
Search engine and directory of free how-to videos.www.wonderhowto.com
Open Yale Courses
Free access to a selection of introductory Yale courses.oyc.yale.edu
FREE PLACEMENT TESTS: We use placement tests to find learning gaps at the beginning
of each school year. Depending on the tests we use, we can easily take AT LEAST a week to do all of the testing. No matter what grade our child is in they begin with the lowest grade level and work their way up until they no longer knowwhat's going on. We do this so I can review the test, find the gaps and "fill them in" while continuing our educational path. We highly suggest using an assessment and/or placement test at least once per year. It's the easiest way to gauge progress or lack-there-of. The sooner we know, the sooner we can address the issues.
FREE Printable Math Placement Tests
AOP LANGUAGE AND MATH DIAGNOSTIC TESTS: 1st thru 12th grade. Can save as a PDF to use in future years.
EVERY TEST REVIEW IMAGINABLE: ACT, SAT, GED...SO MANY!
COLLEGE COMPASS TESTING
Online testing: GRADES 3RD THRU 12TH
**You will have to fill out the online form if you choose the Switched-0n-Schoolhouse testing. K-6 READING
PRINTABLE ASSESSMENT TESTS 1ST THRU 8TH GRADES
ASSESSMENT TESTS FOR JUST ABOUT EVERYTHING K - 12TH GRADES
READING COMPETENCY
MATH
MATH 5TH THRU CALCULUS
READING ASSESSMENT
ENGLISH
LANGUAGE
4th of July Coloring Pages!
| american_flag_coloring_book_page.pdf |
| american_flag_coloring_pages.pdf |
| eagle_us_flag_coloring_pages.pdf |
| july_4th_coloring_pages.pdf |
| god_bless_america_coloring_page.pdf |
| statue_of_liberty_coloring_pages.pdf |
| united_states_flag_coloring_page.pdf |
| us_map_coloring_pages.pdf |
Cornmeal Play
Target Age: Middle One-Year Old
Materials You Will Need: plastic container, cornmeal
What To Do: Children learn by using the sense of touch. Your child develops hand muscles needed for fine motor skills while participating in this and similar activities. Your child will experience a 'new feel' using cornmeal today! Fill a large plastic container with cornmeal. Put measuring cups and scoops in the container. Enjoy observing your child play. If you are brave, add some water to the cornmeal!
Skills Learned:Activity Category:Activity Contributor:Beth Bronsil, M. Ed.
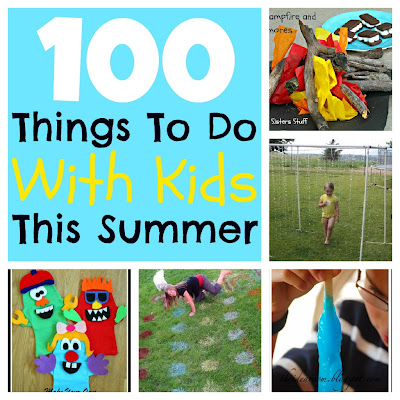
100 things to do with kids this summer
Free Online Bedtime Stories
Safety Pin Freedom Butterfly
Butterflies are a true symbol of freedom. Now you can make these patriotic butterflies from safety pins and pony beads. You need:
Cut cord to 30". Stiffen ends with white glue. Let dry.
Open ten size 2 safety pins and string on the beads as shown on the diagram.
String the cord through the head of the coiless pin. Center the pin in the middle of the string. Open the pin. String one gold pony bead on both ends and onto the coiless pin. This will be the head. String the six upper wing safety pins onto the coiless pin, alternating the pins for the left and right wing. String the right hand cord through the bead on the top right wing safety pin. String on a bead then string through the head of that safety pin. String on a bead then string through the head of the second safety pin. String on a bead then string through the head of the third safety pin and through the beads of the third safety pin. Repeat with the other cord.
String one bead on both ends and onto the size 4 pin. String the four lower wing safety pins onto the coiless pin, alternating the pins for the left and right wing. String the right hand cord through the beads on the first safety pin of the lower wing then through the head of that pin. String on a bead then string through the head of that second pin. String on a three metallic beads then string through the beads of the last safety pin. Repeat with the other cord.
String a bead on both cord ends and on to the size 4 pin. Close the pin. String two beads on each string. Tie off with a double knot and trim.
- 10 GoldSafety Pins, Size 2
- 1 Gold Coiless Safety Pin - 2¼"
- 17 Metallic Pony Beads
- 10 Red Pony Beads
- 8 White Pony Beads
- 20 Blue Pony Beads
- 2 White Star Pony Beads
- White Glue
- 30" Metallic Cord
Cut cord to 30". Stiffen ends with white glue. Let dry.
Open ten size 2 safety pins and string on the beads as shown on the diagram.
String the cord through the head of the coiless pin. Center the pin in the middle of the string. Open the pin. String one gold pony bead on both ends and onto the coiless pin. This will be the head. String the six upper wing safety pins onto the coiless pin, alternating the pins for the left and right wing. String the right hand cord through the bead on the top right wing safety pin. String on a bead then string through the head of that safety pin. String on a bead then string through the head of the second safety pin. String on a bead then string through the head of the third safety pin and through the beads of the third safety pin. Repeat with the other cord.
String one bead on both ends and onto the size 4 pin. String the four lower wing safety pins onto the coiless pin, alternating the pins for the left and right wing. String the right hand cord through the beads on the first safety pin of the lower wing then through the head of that pin. String on a bead then string through the head of that second pin. String on a three metallic beads then string through the beads of the last safety pin. Repeat with the other cord.
String a bead on both cord ends and on to the size 4 pin. Close the pin. String two beads on each string. Tie off with a double knot and trim.

Pride Pins
Show your pride! in your troop... your country... or your parent that has gone off to fight the war. You Need:
Instructions:
Cut satin cord into 18" lengths. Fold in half and half hitch to a safety pin by placing the folded end down through the pin and drawing the cord ends down through the folded end loop. Diagram at right shows how a key ring will look with cord half hitched to it.
String the top bead onto both cords and push up to the safety pin. Lace the first row of three beads onto one cord. Lace the other cord through the same beads in reverse order. Pull both cords snugly. Continue with the next row of three beads until you have laced the five rows.
String the bottom bead onto both cords and push up to the last row. Tie off. Trim cords.
Show your pride! in your troop... your country... or your parent that has gone off to fight the war. You Need:
- Safety Pins
- Pony BeadsUse red, white and blue for the USA pin.Use yellow for a parent that has gone to war.Use blue and yellow for cub scouts.Use green for girl scouts.Use brown for brownies.
- Letter Beads or Number Beads
- 18" Satin Cord
Instructions:
Cut satin cord into 18" lengths. Fold in half and half hitch to a safety pin by placing the folded end down through the pin and drawing the cord ends down through the folded end loop. Diagram at right shows how a key ring will look with cord half hitched to it.
String the top bead onto both cords and push up to the safety pin. Lace the first row of three beads onto one cord. Lace the other cord through the same beads in reverse order. Pull both cords snugly. Continue with the next row of three beads until you have laced the five rows.
String the bottom bead onto both cords and push up to the last row. Tie off. Trim cords.

Flag Pins - Show your Patriotism!
No more struggling with coiled pins! Larger sized "E" beads make beaded pins easier for kids.
You need:
Instructions:
Each row hanging down is a size 2 pin with "E" beads strung on it. Open these pins and string beads following the pattern chosen. Keep in mind that you are stringing the beads upside-down so you will start at the top with of each row and work down. Then turn the pin upside-down. Use pliers to squeeze the pin head closed permanently.
Note: Glass beads are are irregular in size. You will not be able to use the larger "E" beads in your package. It may look like the pins will not close but as long as the tip shows, you can usually just press the point into the pin head opening. The pin will bend out slightly to fit the beads snuggly into place. Open up the coiless pin. You will need to bend it open to at least a 60 degree angle to get the beads on. Beginning with the beaded pin to the far right, thread the coil of that beaded pin onto the coiless pin, around the bend and over to the head of the pin. Slide on a 4mm bead. Then the next beaded pin, followed by another 4mm bead. Continue until you have threaded on all pins and finished off with a final 4mm bead. These beads help hold the pins in place and keep them from sliding around the coiless pin.
Puppy Yarn Bug
Make a puppy dog yarn bug that looks just like your dog! You need:
Optional: You can use these as substitutes on items above:
Instructions:
Make a pompom by wrapping yarn around a 5" piece of cardboard at least 100 times. Mix colors or use all one color. Cut a 6" piece of yarn and slide it under wrapped yarn. Tie tightly into a double knot. Turn cardboard over and cut completely through yarn on this side. Turn yarn blob sideways and smooth down strands.
Press Styrofoam ball onto a hard surface to flatten bottom. (You can also use an egg carton section.) Cover the top and sides of the ball with tacky glue. Separate the strands of the pompom to fit the Styrofoam ball up inside. Press pompon into place. Arrange yarn.
Print any patterns your bug might need. Staple all around patterns onto craft foam or felt as listed in the supply list. Cut out pieces. Glue the bottom of the Styrofoam ball on to the foam feet. Glue on eyes. For optional arms, cut the pipe cleaner in half. Glue on hands. Poke the pipe cleaners into the bug for arms. Bend at the elbows. Glue on the wiggle eyes.
Cut 3" ovals out of craft foam for floppy ears or 1" triangles for upright ears. Glue a piece of pipe cleaner to the back and push into the Styrofoam ball. Cut other details -- like spots -- out of foam and glue on. Use 1/8" hole punch to make spots on cheeks.
Make a puppy dog yarn bug that looks just like your dog! You need:
- Brown, White, Black and/or Tan Yarn
- Brown, White, Black and/or Tan Craft Foam
- Foam Feet
- Wiggle Eyes -- 20mm
- Pipe Cleaner
- 2-1/2" Styrofoam Ball
- Old 3½" Floppy Disk or Heavy Cardboard Cut to the Size of One
- Tacky Glue
- Scissors
- 1/8" Hole Punch
Optional: You can use these as substitutes on items above:
- Craft Foam and Foot Pattern
- Craft Foam and Hand Pattern or Bug Hands and Card Stock
- Bug Eyes and Card Stock
Instructions:
Make a pompom by wrapping yarn around a 5" piece of cardboard at least 100 times. Mix colors or use all one color. Cut a 6" piece of yarn and slide it under wrapped yarn. Tie tightly into a double knot. Turn cardboard over and cut completely through yarn on this side. Turn yarn blob sideways and smooth down strands.
Press Styrofoam ball onto a hard surface to flatten bottom. (You can also use an egg carton section.) Cover the top and sides of the ball with tacky glue. Separate the strands of the pompom to fit the Styrofoam ball up inside. Press pompon into place. Arrange yarn.
Print any patterns your bug might need. Staple all around patterns onto craft foam or felt as listed in the supply list. Cut out pieces. Glue the bottom of the Styrofoam ball on to the foam feet. Glue on eyes. For optional arms, cut the pipe cleaner in half. Glue on hands. Poke the pipe cleaners into the bug for arms. Bend at the elbows. Glue on the wiggle eyes.
Cut 3" ovals out of craft foam for floppy ears or 1" triangles for upright ears. Glue a piece of pipe cleaner to the back and push into the Styrofoam ball. Cut other details -- like spots -- out of foam and glue on. Use 1/8" hole punch to make spots on cheeks.
Chick Yarn Bug
Who can resist this cute little baby chick yarn bug? You need:
Make a pompom by wrapping yarn around a 5" piece of cardboard at least 100 times. Mix colors or use all one color. Cut a 6" piece of yarn and slide it under wrapped yarn. Tie tightly into a double knot. Turn cardboard over and cut completely through yarn on this side. Turn yarn blob sideways and smooth down strands.
Press Styrofoam ball onto a hard surface to flatten bottom. (You can also use an egg carton section.) Cover the top and sides of the ball with tacky glue. Separate the strands of the pompom to fit the Styrofoam ball up inside. Press pompon into place. Arrange yarn.
Print any patterns your bug might need. Staple all around patterns onto craft foam or felt as listed in the supply list. Cut out pieces. Glue the bottom of the Styrofoam ball on to the foam feet. Glue on eyes. For optional arms, cut the pipe cleaner in half. Glue on hands. Poke the pipe cleaners into the bug for arms. Bend at the elbows. Glue on the wiggle eyes.
Curl two small triangles out of orange foam. Glue onto chick for beak. Push feathers into Styrofoam.
- Yellow Yarn
- Orange Craft Foam
- Orange Foam Feet or Wiggle Eyes -- 20mm
- 2-1/2" Styrofoam Ball
- Three Yellow Feathers
- Old 3½" Floppy Disk or Heavy Cardboard Cut to the Size of One
- Tacky Glue
- Scissors
Make a pompom by wrapping yarn around a 5" piece of cardboard at least 100 times. Mix colors or use all one color. Cut a 6" piece of yarn and slide it under wrapped yarn. Tie tightly into a double knot. Turn cardboard over and cut completely through yarn on this side. Turn yarn blob sideways and smooth down strands.
Press Styrofoam ball onto a hard surface to flatten bottom. (You can also use an egg carton section.) Cover the top and sides of the ball with tacky glue. Separate the strands of the pompom to fit the Styrofoam ball up inside. Press pompon into place. Arrange yarn.
Print any patterns your bug might need. Staple all around patterns onto craft foam or felt as listed in the supply list. Cut out pieces. Glue the bottom of the Styrofoam ball on to the foam feet. Glue on eyes. For optional arms, cut the pipe cleaner in half. Glue on hands. Poke the pipe cleaners into the bug for arms. Bend at the elbows. Glue on the wiggle eyes.
Curl two small triangles out of orange foam. Glue onto chick for beak. Push feathers into Styrofoam.
Patterns for Hands and Feet